Welcome to this guide on creating a Recursive Division Maze Algorithm in JavaScript. In this blog, we’ll dive into the Recursive Division method, and we’ll explore the underlying theory and step-by-step implementation to help you build your own maze generator from scratch in Javascript!
Setting Up the Environment
To make this as accessible as possible, I am going to be using vanilla JavaScript in jsfiddle. Here is the link to my jsfiddle.
HTML and CSS
The HTML and CSS are going to be extremely straightforward for this project.
The HTML just contains a single div with id “grid”. Later, using JavaScript, we are going to programmatically add divs within this div.
Note that if you’re not using JSFiddle, then you will have to use the entire HTML boilerplate for it to work
<div id="grid"></div>For the CSS, we just style the body of the document and add node, wall, and grid classes:
/*Centering the grid in the body of the page*/
body {
    display: flex;
    height: 100vh;
    justify-content: center;
    align-items: center;
}

/*Creating a 50-column-wide css grid*/
#grid {
    display: grid;
    grid-template-columns: repeat(50, 15px);

}

/*A 15x15 pixel square with a black border*/
.node {
    width: 15px;
    height: 15px;
    border: 1px solid black;
}

/*A class on top of the .node class to make it all black*/
.wall {
    background: black;
}
For the body, we’re using a flexbox to center the grid in the middle of the page. In the #grid class, we’re using the css grid layout to create the grid-like pattern. repeat(50, 15px) just means that we will have 50 columns, 15 pixels each. If you are planning to have a different grid size, make sure to change this.
JavaScript
Before we create the algorithm, we need to add the nodes(cells) to the grid and a few other helper functions to ease the process.
First, we initialize some constants:
const width = 50;
const height = 20;
const nodes = [];
The nodes array will store the coordinates of the nodes. We then create each node and append to this array
for (let y = 0; y < height; y++) {
  const row = [];
  for (let x = 0; x < width; x++) {
    row.push({
      x: x,
      y: y,
    });
  }
  nodes.push(row);
}
Each node is represented as an object with an x and a y property. They store the column number and the row number of the node respectively.
To simplify this process, I’m storing the coordinates in a string format: “x, y”. This allows us to save the coordinates within the div element using a data attribute.
const pointToString = (pos) => {
  return `${pos.x}, ${pos.y}`;
};
This helper function takes in the node coordinates as an object and outputs the same as a string.
Now we use the pointToString helper function to create the divs for the nodes and append them to our grid div in the UI
# Querying the grid div by id
gridDiv = document.getElementById("grid");

# nodes is a 2D array so flatten it and then create a div for each node coordinate
# We attach a data-pos attribute to keep track of the node's coordinates
nodes.flat().forEach((node) => {
  # Creating the div element for the node
  const nodeDiv = document.createElement("div");

  # Adding its class and data-pos attribute
  nodeDiv.setAttribute("class", "node");
  nodeDiv.setAttribute("data-pos", pointToString(node));

  #Appending it to the grid element
  gridDiv.appendChild(nodeDiv);
});
Finally, we will create a addWallsToUI helper function which takes in a list of string coordinates like “x, y”, finds the right node in our grid and adds the “wall” class to it.
const addWallsToUI = (walls) => {
for (const wall of walls) {
const nodeToChange = document.querySelector(`div[data-pos="${wall}"]`)
nodeToChange.classList.add("wall");
}
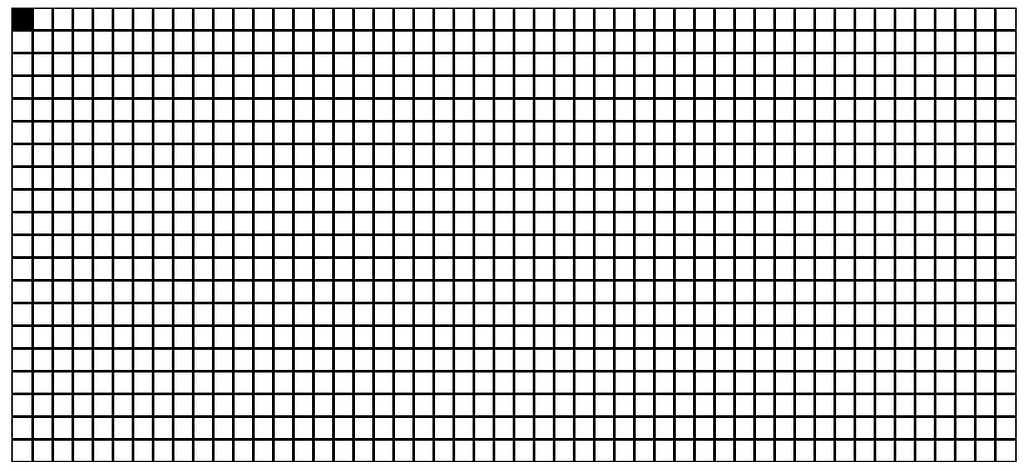
};Sanity Check: At this point, if you run the addWallsToUI(["0, 0"]) command, you should get a single black box on the top left of the grid.
Adding Borders
We’re at the last step of the setting-up process before we tackle on the algorithm. I am making a closed-maze so the start and the end are in the maze itself, but you can always modify it to have two random openings to make it open.
To make the walls, we’re going to go across each of the 4 sides of the grid, get the coordinates of the border nodes, and simply append them to an array. The addWallsToUI function will take care of the rest.
const addBorders = (width, height) => {
const borders = [];
# Top Side
for (let i = 0; i < width; i++) {
borders.push(pointToString({ x: i, y: 0 }));
}
# Right Side
for (let i = 0; i < height; i++) {
borders.push(pointToString({ x: width - 1, y: i }));
}
# Bottom Side
for (let i = width - 1; i >= 0; i--) {
borders.push(pointToString({ x: i, y: height - 1 }));
}
# Right Side
for (let i = height - 1; i >= 0; i--) {
borders.push(pointToString({ x: 0, y: i }));
}
return borders;
};
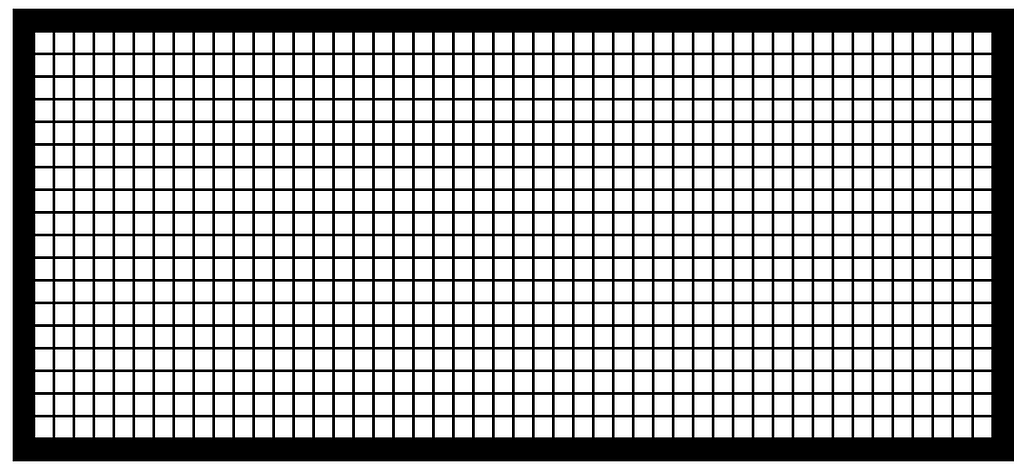
const borders = addBorders(width, height);
addWallsToUI(borders);At this point, your grid should look something like this:
The Algorithm
Finally, we’re ready to code the algorithm.
Workings of the Algorithm
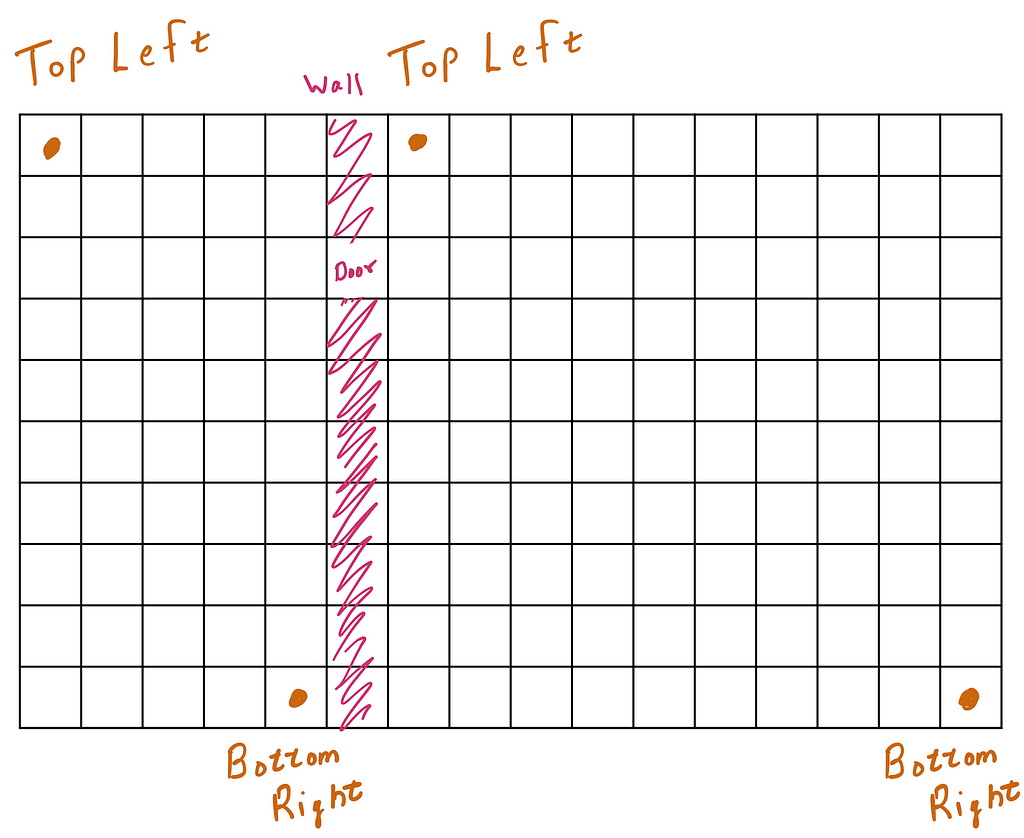
The algorithm store rooms with two points: The top left and the bottom right.
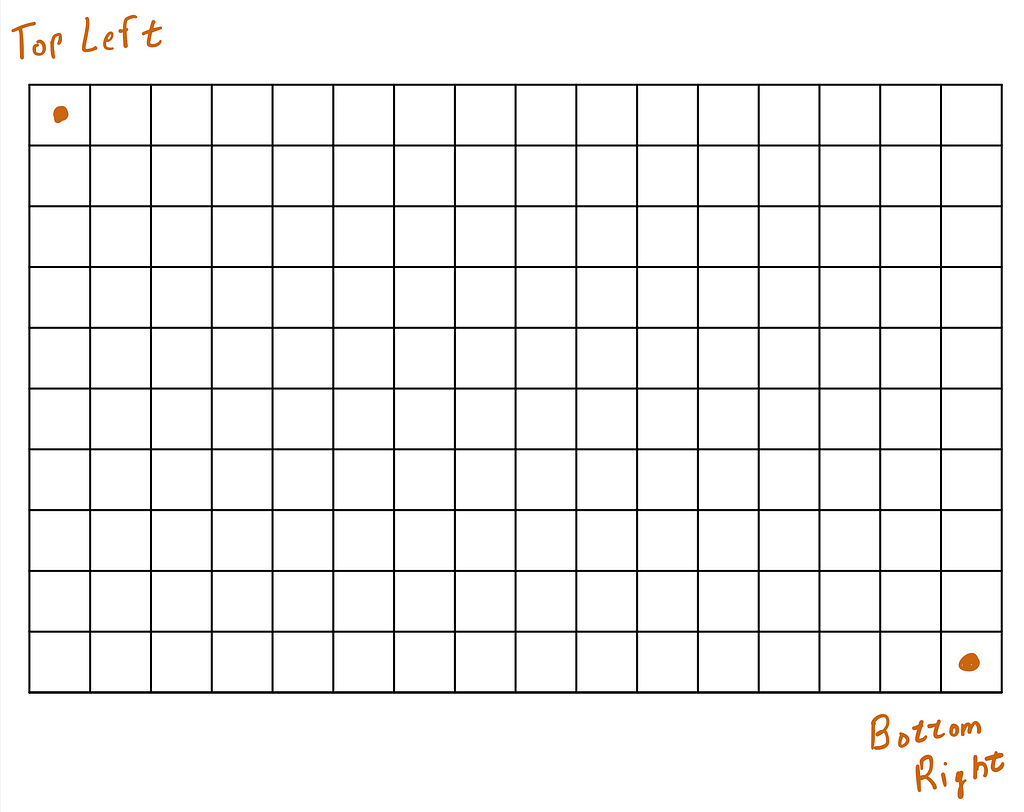
For any given room, we first decide whether it is horizontal or vertical. If the width of the room is greater than the height, then it is horizontal, otherwise it is vertical. If the width and height are the same, then we just pick one orientation at random.
Suppose that the room is horizontal. We choose a random column and place a wall there. Then in that column, we choose a random row to place a door. This will divide our room into two smaller rooms, each with their own top left points and bottom right points.
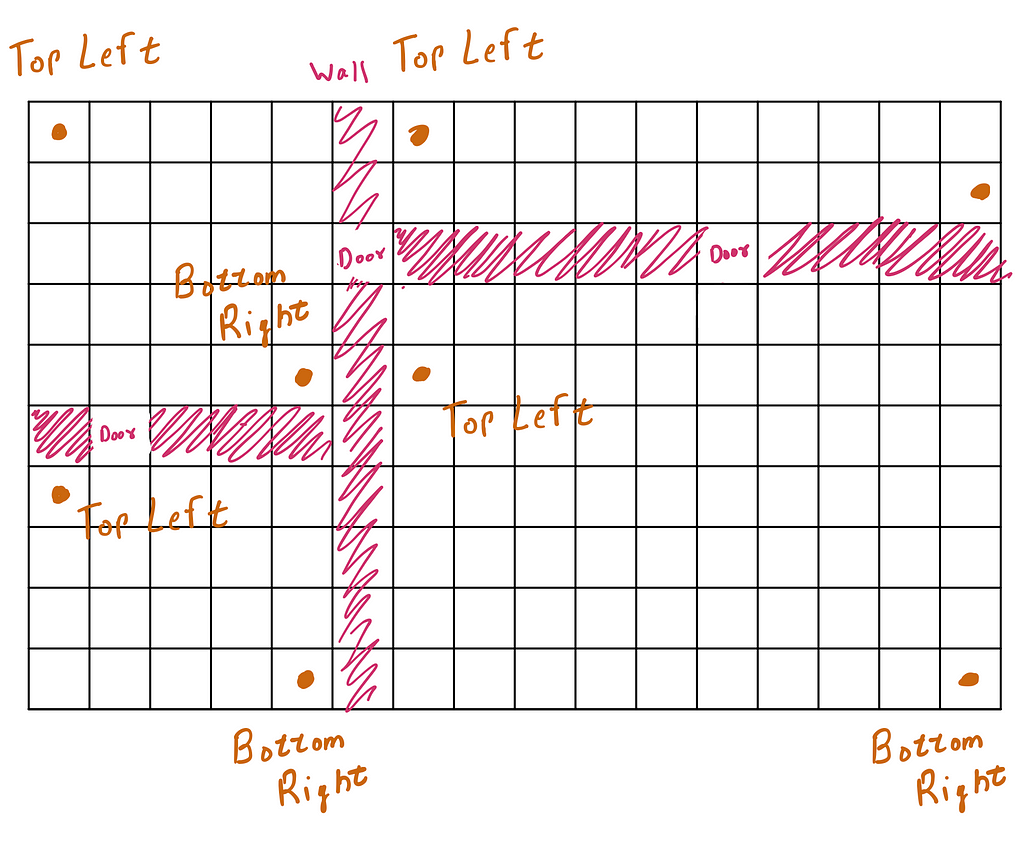
Now, the left room is vertical and the right room is square. For the left room, we now pick a random row to place the wall and a random column within the row to place the door. For the right room, we can choose any orientation.
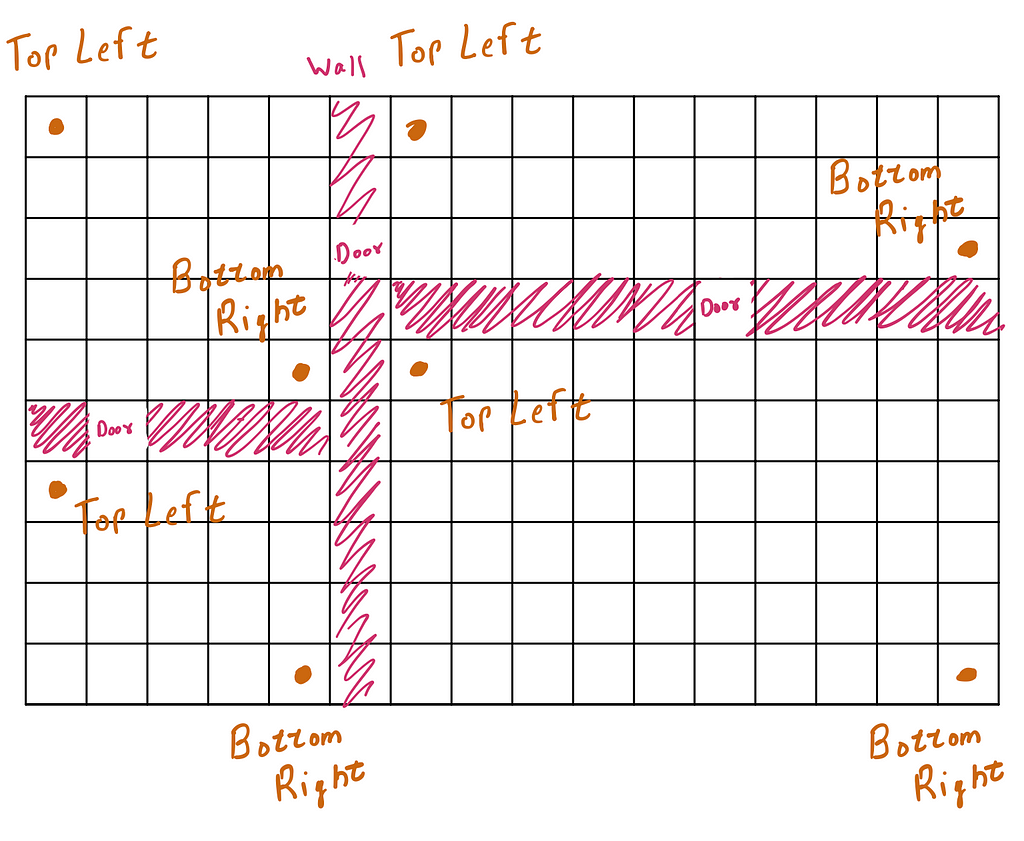
This will divide each of the rooms into 2 even smaller rooms. So, now we have 4 rooms, each with their top left nad bottom right points. We continue on this process till the rooms that are left are too small to be divided.
How do we ensure that one wall doesn’t block a door?
Now, when placing the walls, we can have a condition to check whether or not it is in the same row or column as a door, but that is too unnecessarily complicated to deal with. A much more elegant approach is to only put the walls in even rows and columns and put the doors in odd rows and columns. This will ensure that no door and wall intersect.
Coding the Algorithm
Entry to the Algorithm
const generateRecursiveDivisionMaze = (width, height) => {
  // The algorithm considers the grid as a "room", storing the coordinates of
  // the top left node and the top right node.

  const walls = [];
  const topLeft = { x: 0, y: 0 };
  const bottomRight = { x: width, y: height };

  // Running the recursive function
  divide(walls, topLeft, bottomRight);
  return walls;
};
We begin with the start point of our algorithm. We need to input the top left point (0, 0) and the top right point (width, height). Also, since we’re using recursion, it makes sense to have a “walls” list outside of the recursive function, to which we will append all the coordinates of the maze’s walls.
Choosing orientation function
const chooseOrientation = (width, height) => {

  if (width < height) {
    // The room is upright
    return "vertical";
  } else if (height < width) {
    // The room is sideways
    return "horizontal";
  } else {
    // The room is square. So just use a random number between 0 and 1 to decide the orientation.
    return Math.round(Math.random()) ? "horizontal" : "vertical";

  }
};
This function involves simple if-else blocks to decide whether the room is vertical or horizontal. If the room is square, we randomly decide on the two. To perform the random choice we use Math.random() .This function outputs a random floating point number between 0 and 1. Since halfof the time, the output will be between 0 and 0.5 and halfof the time it will be between 0.5 and 1, we can use the Math.round() function to get either a 0 or a 1. If the number is less than 0.5, we will get 0, otherwise we will get 1.
Helper function to add the walls
const addWall = (walls, startPoint, endPoint, doorIdx) => {
  for (let x = 1; x < endPoint.x - startPoint.x; x++) {
    if (x !== doorIdx - startPoint.x) {
      walls.push(pointToString({ x: startPoint.x + x, y: startPoint.y }));
    }
  }
  for (let y = 1; y < endPoint.y - startPoint.y; y++) {
    if (y !== doorIdx - startPoint.y) {
      walls.push(pointToString({ x: startPoint.x, y: startPoint.y + y }));
    }
  }
};
After we decide the row or column of a wall, we need to put the coordinates of all of the points in that row or a column. To make the process easier, we use a addWall function. It takes in the start point of the wall, end point of the wall, and how far along the door is from the start point. It then uses a for loop to go from the start point to the end point, skipping the door. We run two loops, one which goes in the x direction, and another which goes in the y direction.
Suppose our wall is from (0, 0) to (30, 0). Then the first loop will run from 1 to 30 and add 30 wall blocks to the walls list. It will skip the door index. The second loop will not run at all since the difference in y coordinates is 0. And if our wall is from (0, 0) to (0, 30), then the first loop will not run but the second loop will run.
The Recursive Division
At the start of the recursive function, we add our base case. i.e if the room is too small, then just return and don’t do anything. We do this by checking the width and the height of the room. If either of them is at most 3, then return.
// The base case. If the current room is too small, then return.
if (bottomRight.y - topLeft.y <= 3 || bottomRight.x - topLeft.x <= 3) return;
Afterwards, we have to decide what orientation our room is currently in. We use the chooseOrientation function from above
const orientation = chooseOrientation(
  bottomRight.x - topLeft.x,
  bottomRight.y - topLeft.y,
);
Now, we split our function into two cases: If the orientation is vertical and if the orientation is horizontal.
Code for vertical room
const possibleRows = [];
const possibleColumns = [];
if (orientation === "vertical") {
    for (let i = topLeft.y + 2; i <= bottomRight.y - 2; i += 2) {
      possibleRows.push(i);
    }
    for (let i = topLeft.x + 1; i <= bottomRight.x - 1; i += 2) {
      possibleColumns.push(i);
    }
For each wall and door, we need to first figure out all the even indices and all of the odd indices. If our orientation is vertical, the wall will horizontal. So, our possible rows will contain all the even indices. But we need to pick a random column for a door. So our possible columns will contain all the odd indices.
To explain further, If the orientation is vertical, we start from the top 2nd row and go down till the bottom 2nd row, pushing every other row into the possibleRows list. So, if our room goes from (0, 0) to (50, 20), the lists will be:
possibleRows = [2, 4, 6, 8, ...20]
possibleColumns = [1, 3, 5, 7, ... 49]
From the possible rows and columns, we now pick a random row for the wall and a random column for the door. To do this, we use the getRandomInt function as defined:
const getRandomInt = (max) => {
  return Math.floor(Math.random() * max);
};
This just takes in a maximum value and then outputs a random integer between 0 and output value, inclusive. It uses the same logic as the previous random choice code, but now scales up the random number by the maximum value.
const wallY = possibleRows[getRandomInt(possibleRows.length - 1)];
const doorX = possibleColumns[getRandomInt(possibleColumns.length - 1)];
Finally, we add the walls to the walls list
addWall(
  walls,
  { x: topLeft.x, y: wallY },
  { x: bottomRight.x, y: wallY },
  doorX
);
Looking back at the diagram, we now have 2 rooms. We can run the recursive function on each of the two rooms, ensuring that our top left and bottom right coordinates are right:
divide(walls, topLeft, { x: bottomRight.x, y: wallY });
divide(walls, { x: topLeft.x, y: wallY }, bottomRight);
Code for horizontal room
for (let i = topLeft.x + 2; i <= bottomRight.x - 2; i += 2) {
      possibleColumns.push(i);
    }
    for (let i = topLeft.y + 1; i <= bottomRight.y - 3; i += 2) {
      possibleRows.push(i);
    }

    const wallX = possibleColumns[getRandomInt(possibleColumns.length - 1)];
    const doorY = possibleRows[getRandomInt(possibleRows.length - 1)];

    addWall(
      walls,
      { x: wallX, y: topLeft.y },
      { x: wallX, y: bottomRight.y },
      doorY
    );

    divide(walls, topLeft, { x: wallX, y: bottomRight.y });
    divide(walls, { x: wallX, y: topLeft.y }, bottomRight);
Our code for the horizontal room is pretty much the same, the only difference is that the possibleColumns contain even indices and possibleRows contains odd indices. Also the new top lefts and bottom rights of the resulting two rooms will be different.
Final Code for the Algorithm
const divide = (walls, topLeft, bottomRight) => {
  // The base case. If the current room is too small, then return.
  if (bottomRight.y - topLeft.y <= 3 || bottomRight.x - topLeft.x <= 3) return;

  const possibleRows = [];
  const possibleColumns = [];

  const orientation = chooseOrientation(
    bottomRight.x - topLeft.x,
    bottomRight.y - topLeft.y,
  );
  if (orientation === "vertical") {
    for (let i = topLeft.y + 2; i <= bottomRight.y - 2; i += 2) {
      possibleRows.push(i);
    }
    for (let i = topLeft.x + 1; i <= bottomRight.x - 1; i += 2) {
      possibleColumns.push(i);
    }

    const wallY = possibleRows[getRandomInt(possibleRows.length - 1)];
    const doorX = possibleColumns[getRandomInt(possibleColumns.length - 1)];

    addWall(
      walls,
      { x: topLeft.x, y: wallY },
      { x: bottomRight.x, y: wallY },
      doorX
    );

    divide(walls, topLeft, { x: bottomRight.x, y: wallY });
    divide(walls, { x: topLeft.x, y: wallY }, bottomRight);
  } else {
    for (let i = topLeft.x + 2; i <= bottomRight.x - 2; i += 2) {
      possibleColumns.push(i);
    }
    for (let i = topLeft.y + 1; i <= bottomRight.y - 3; i += 2) {
      possibleRows.push(i);
    }

    const wallX = possibleColumns[getRandomInt(possibleColumns.length - 1)];
    const doorY = possibleRows[getRandomInt(possibleRows.length - 1)];

    addWall(
      walls,
      { x: wallX, y: topLeft.y },
      { x: wallX, y: bottomRight.y },
      doorY
    );

    divide(walls, topLeft, { x: wallX, y: bottomRight.y });
    divide(walls, { x: wallX, y: topLeft.y }, bottomRight);
  }
};
Finally, adding the maze to the UI
addWallsToUI(generateRecursiveDivisionMaze(width, height));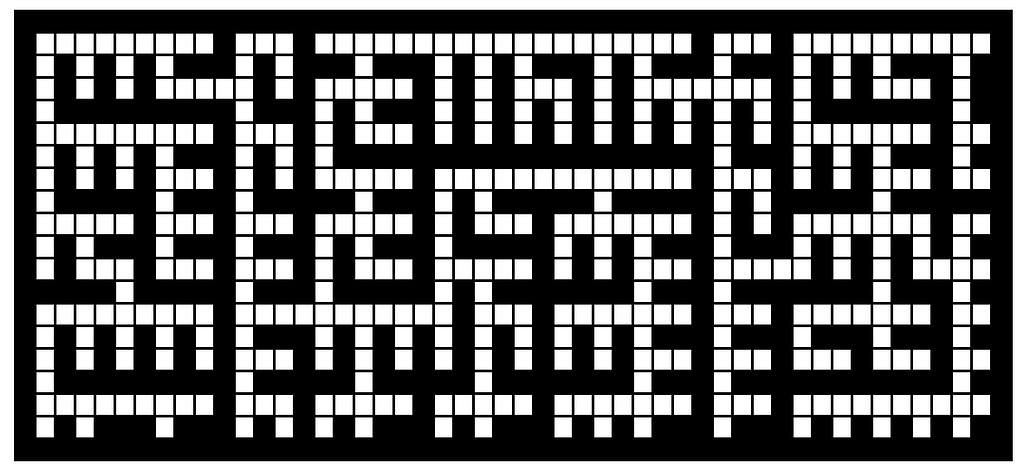
Conclusion
And there you have it! We’ve created a Recursive Division Maze in JavaScript using vanilla JavaScript, HTML, and CSS.
Feel free to check out the complete project on JSFiddle
I hope you found this guide helpful and you learned something new about maze generation algorithms. Happy coding!
Creating a Recursive Division Maze Algorithm in JavaScript was originally published in Towards Dev on Medium, where people are continuing the conversation by highlighting and responding to this story.